
This document describes the complete workflow for general users, from account registration to completing data collection and exporting results.
It is intended for first-time users of the platform.
1. Overall Workflow Overview
The complete user operation flow is as follows:- Register an account
- Log in to the system
- Create a task
- Configure targets
- Collect data
- Preview results
- Export data
2. User Registration
2.1 Access the Registration Page
Users visit the official website and click the “Go to Console” button in the top-right corner to enter the registration page.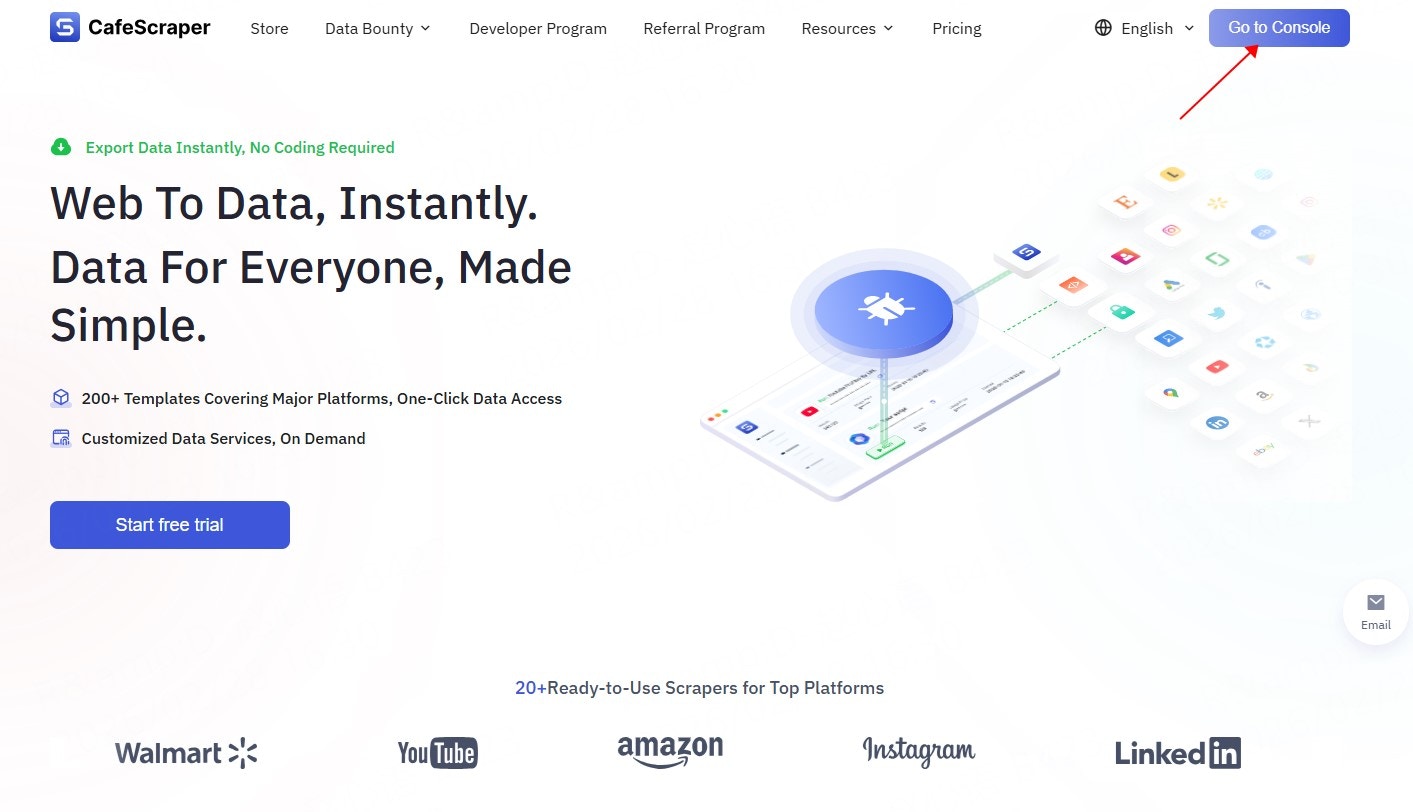

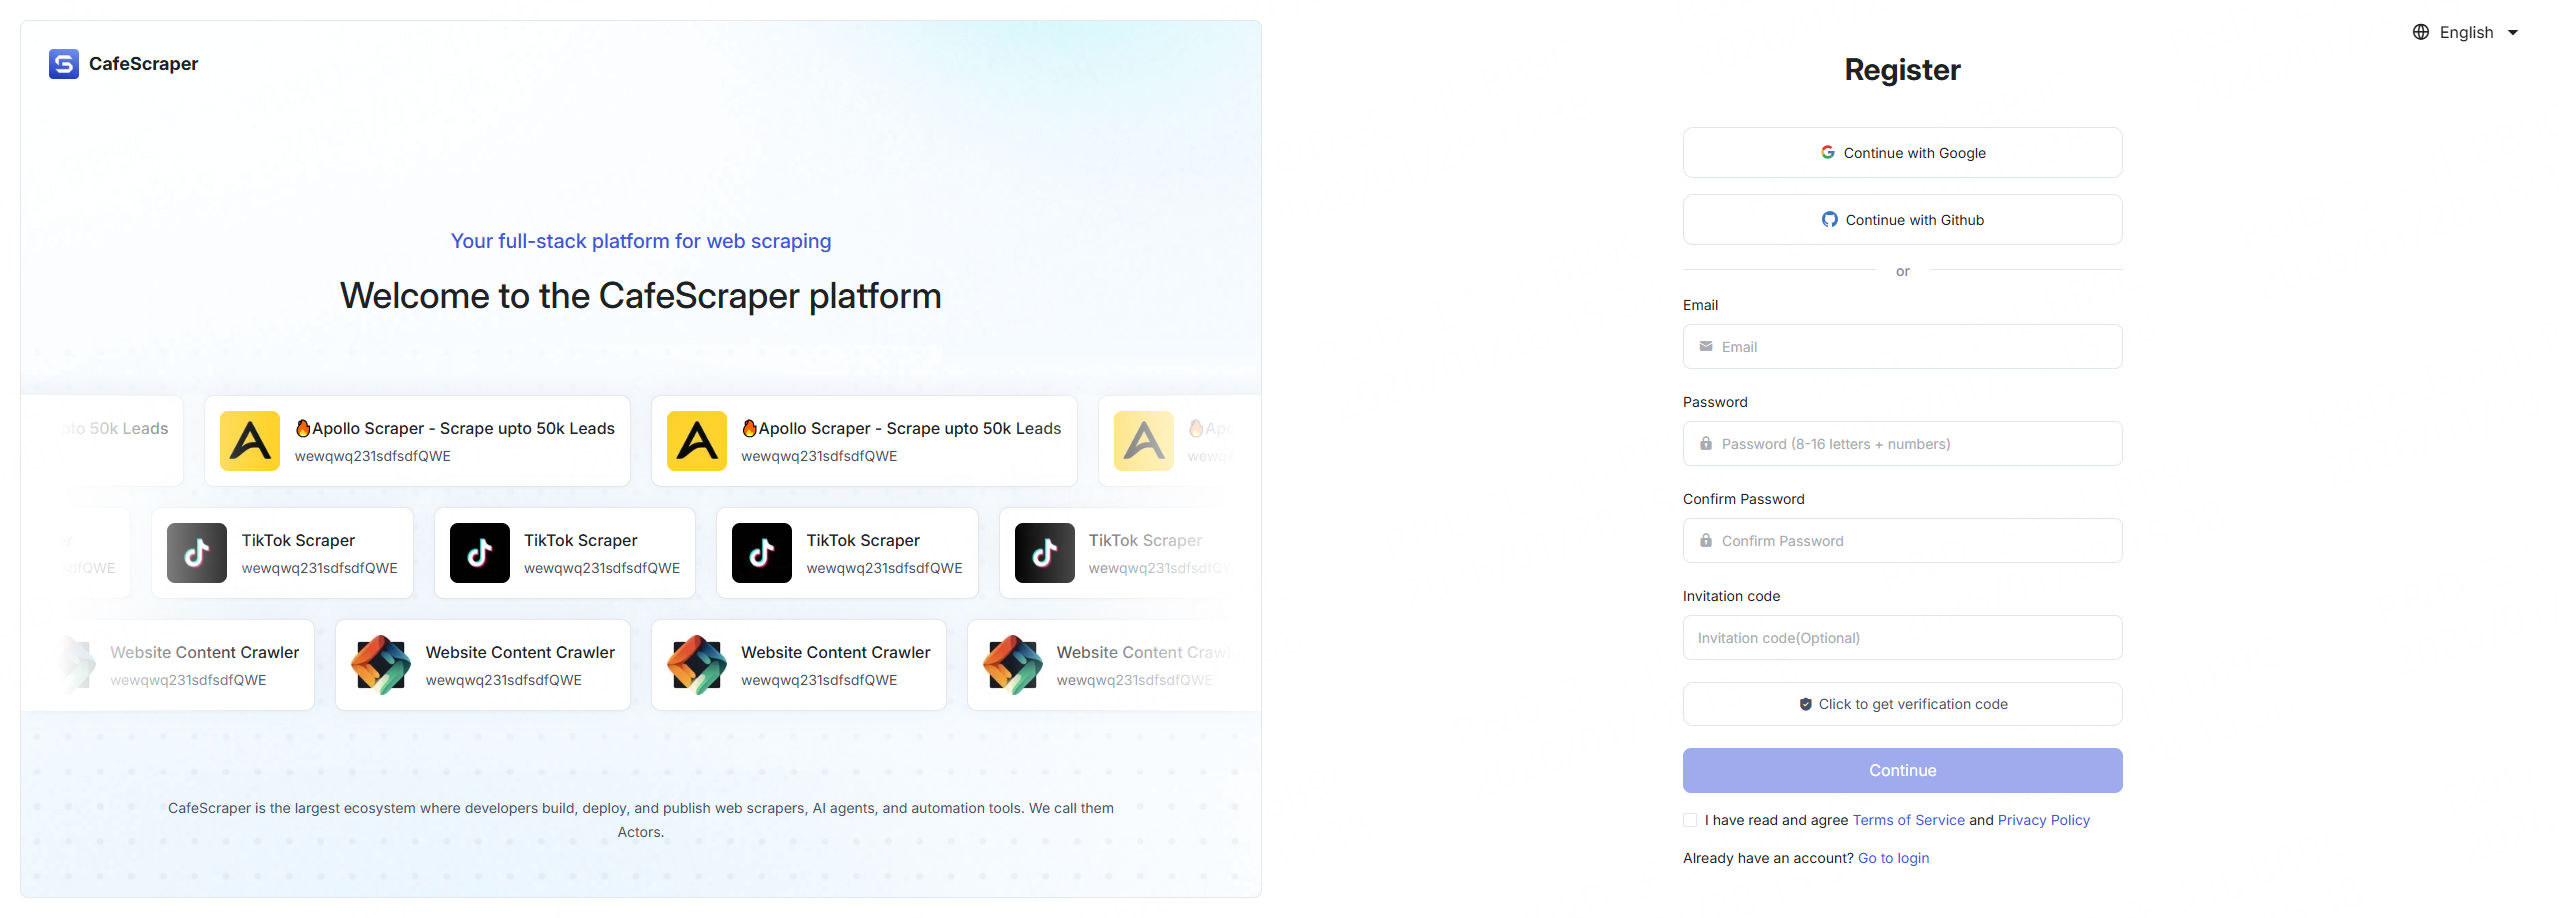
2.2 Fill in Registration Information
On the registration page, users are required to provide the following information:- Email address
- Login password
- Confirm password
- Invitation code (optional)
- CAPTCHA
3. User Login
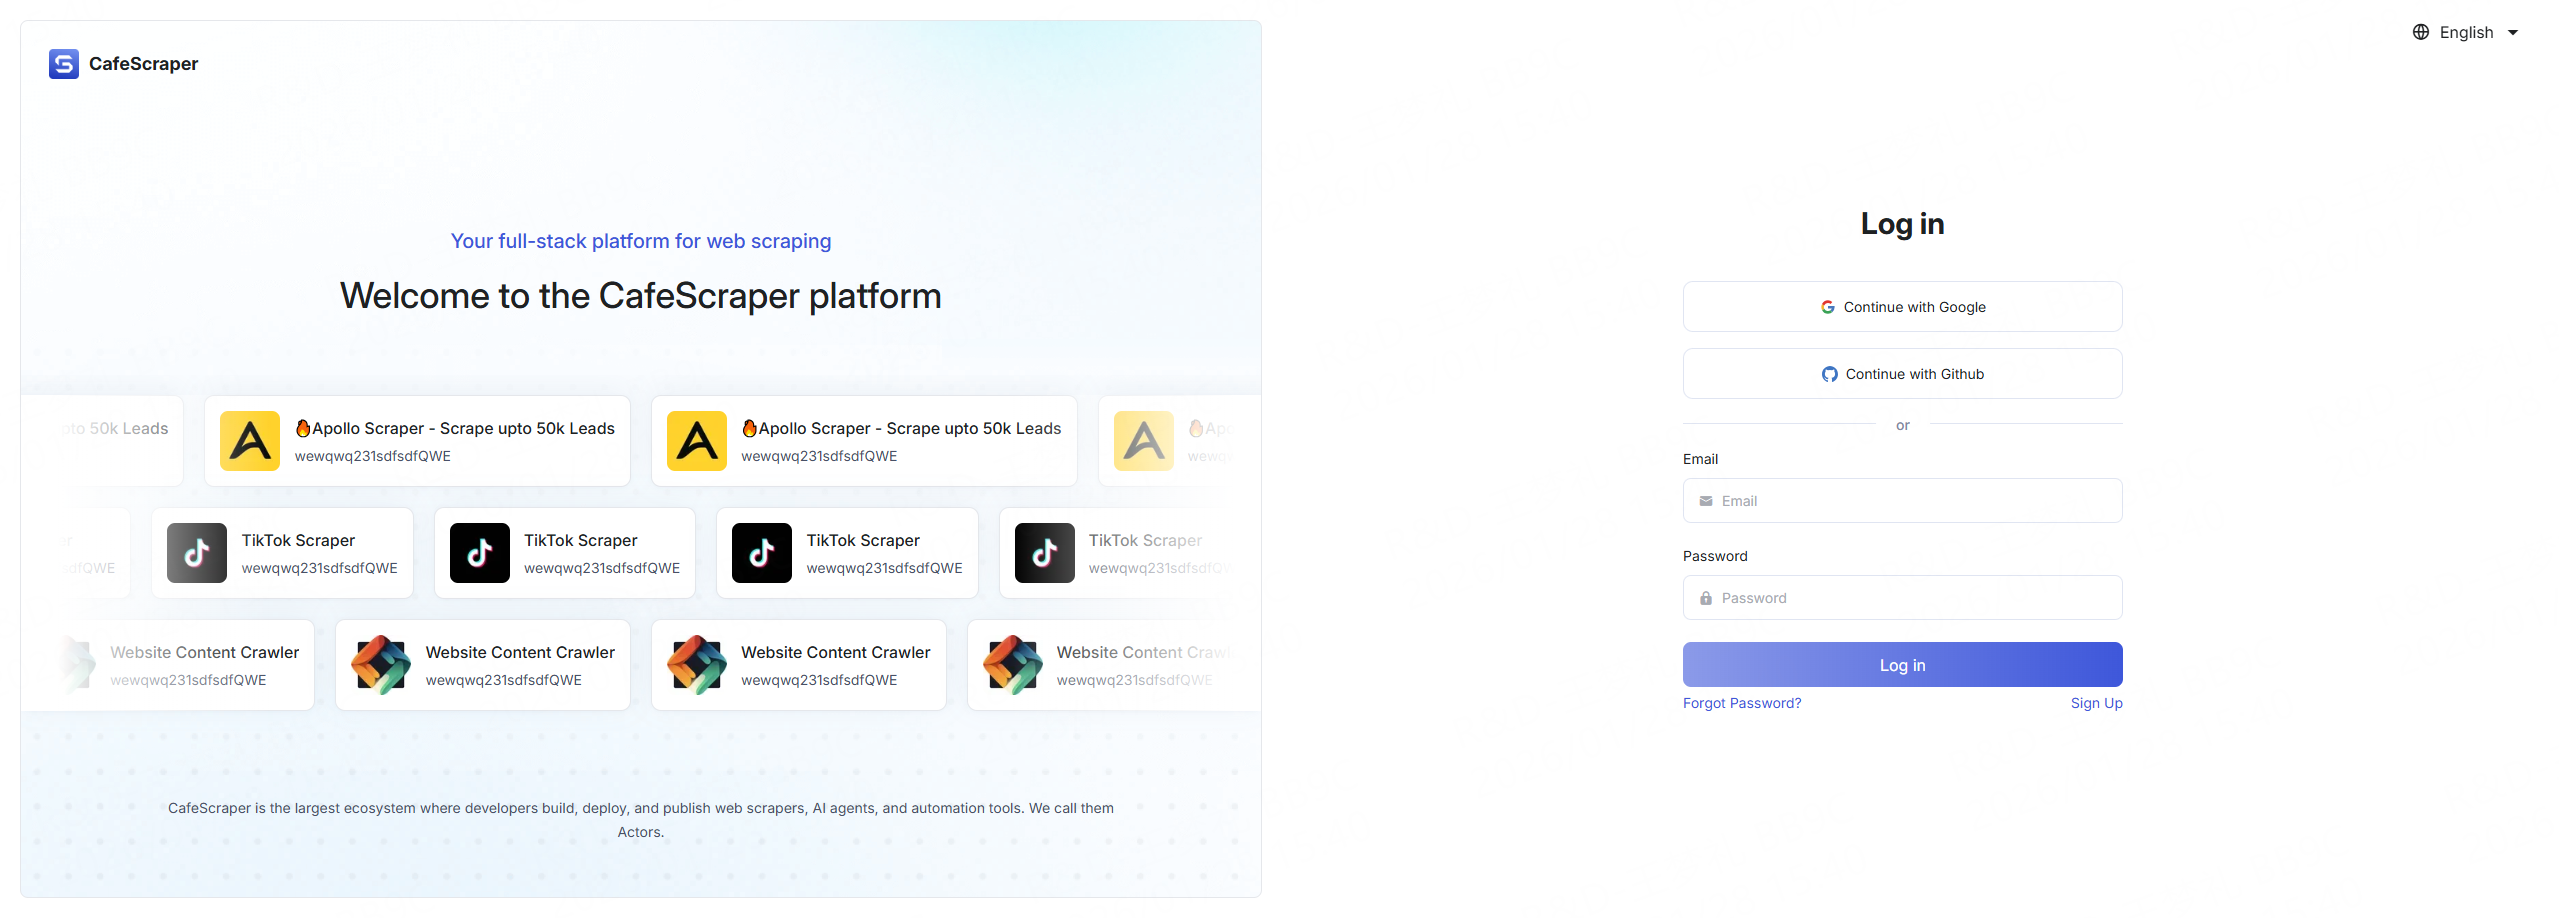
3.1 Log in to the System
On the login page, users enter:- Username
- Password
3.2 Access the Console After Login
After successful login, users are redirected to the main console, where they can view task overviews, usage guides, and related information.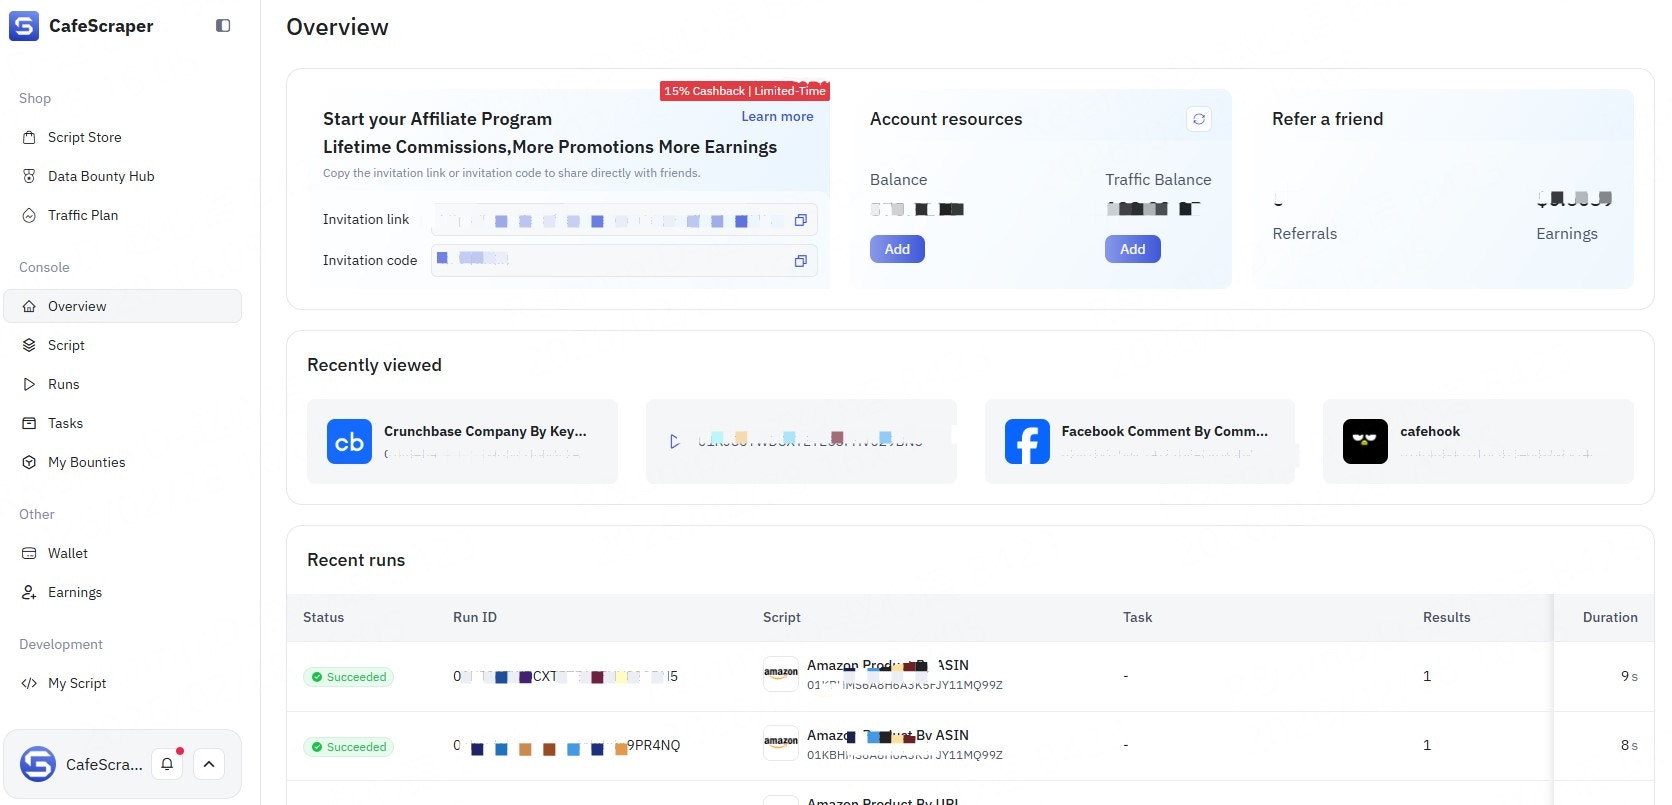

4. Create a Data Collection Task
4.1 Enter Task Management
In the left-side menu, click Template → select the script (Template) you want to run.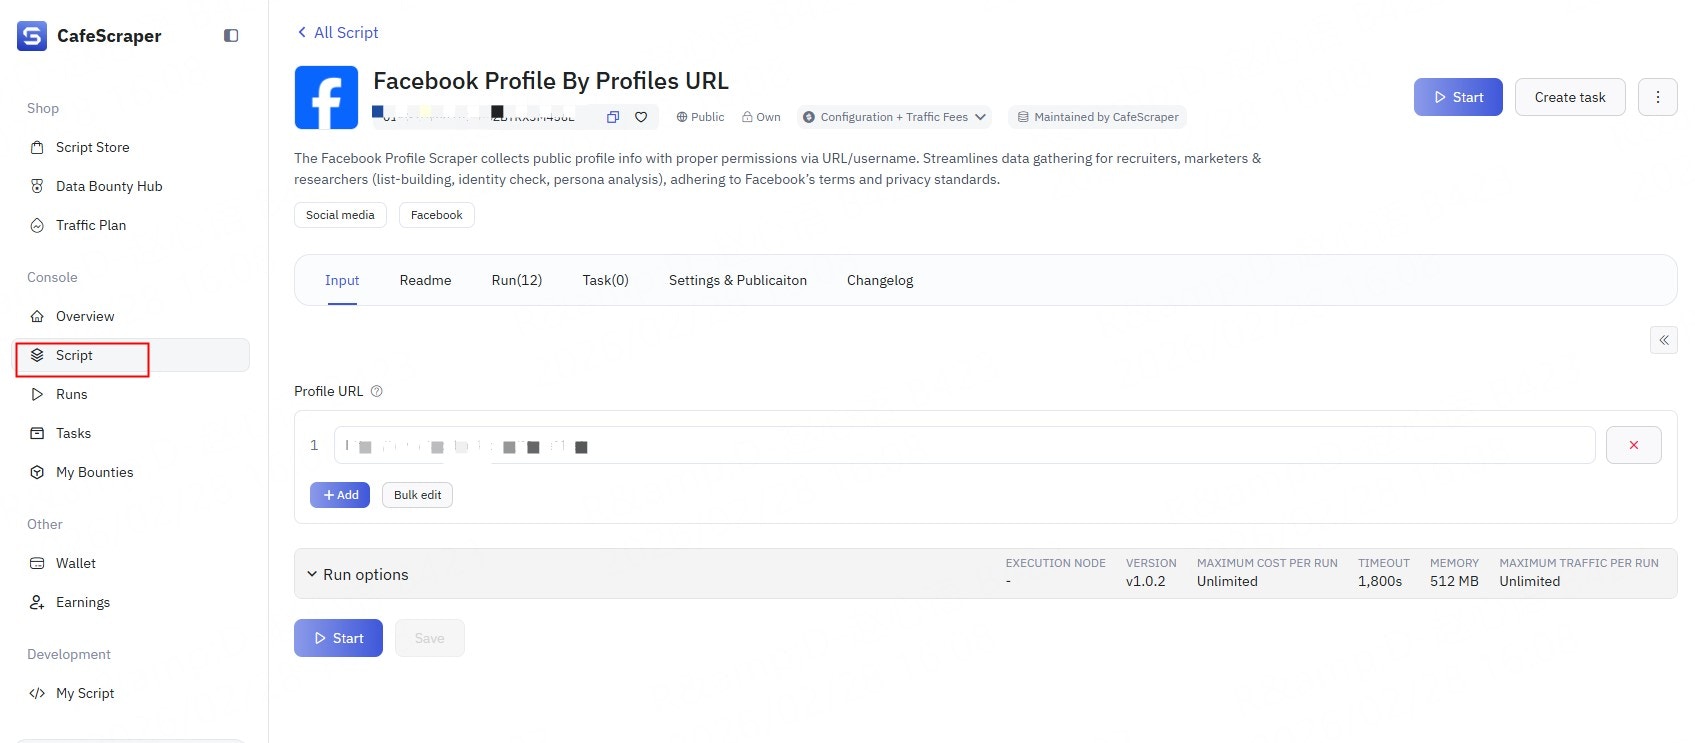

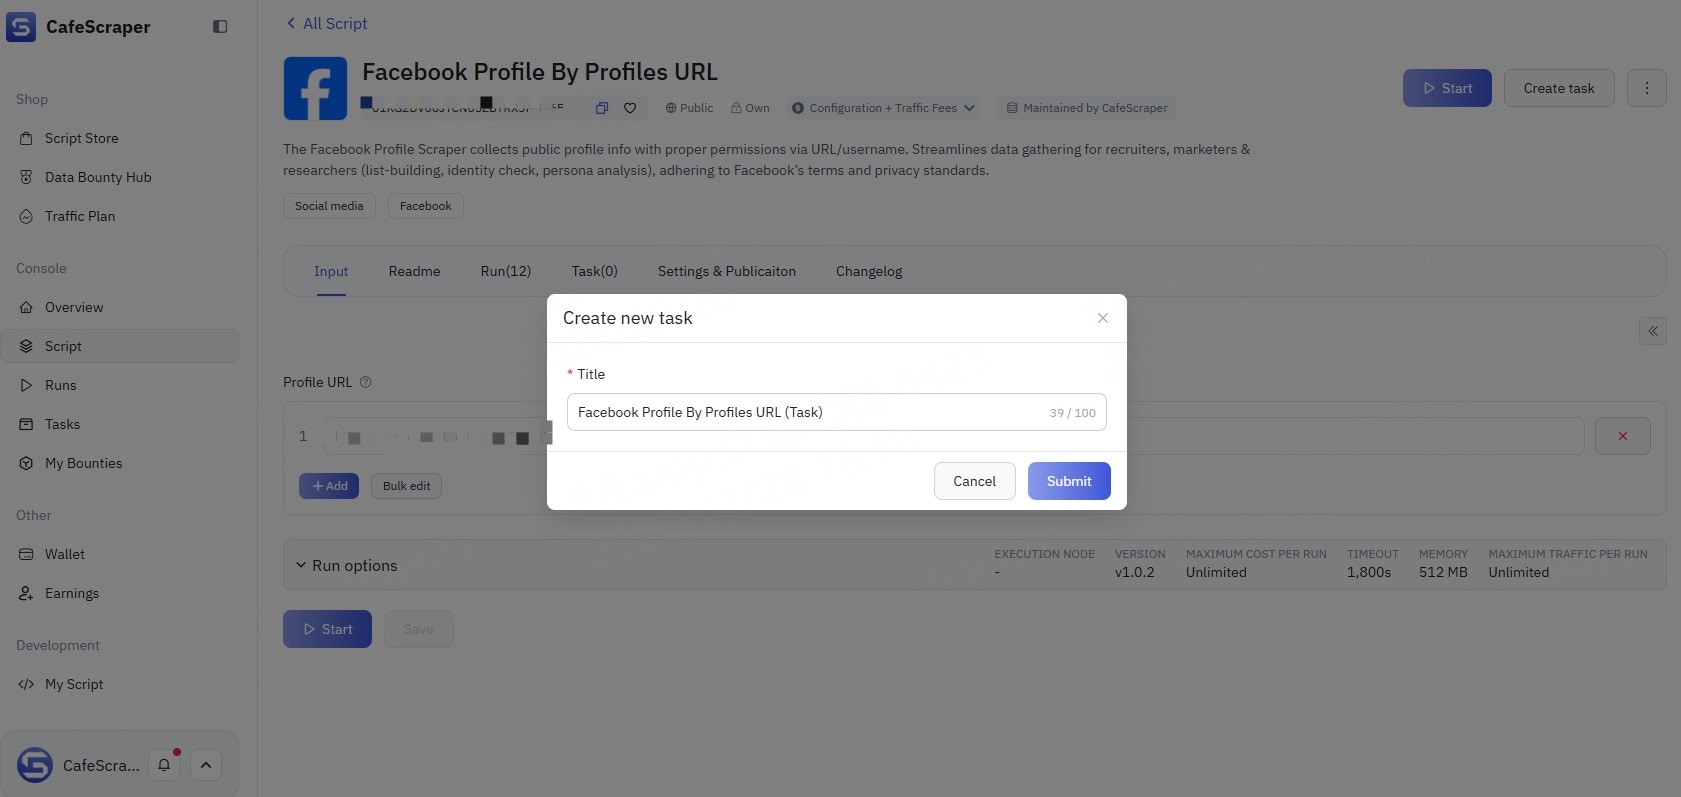
4.2 Fill in Basic Task Information
When creating a new task, users need to provide:-
Task name (used to distinguish between different tasks)

5. Configure Collection Parameters
5.1 Set Collection Rules
On the parameter configuration page, users can configure:- Target page URL / URL patterns
- Data fields to collect (e.g., title, content, timestamp, etc.)
- Whether to enable pagination
- Collection depth / quantity limits


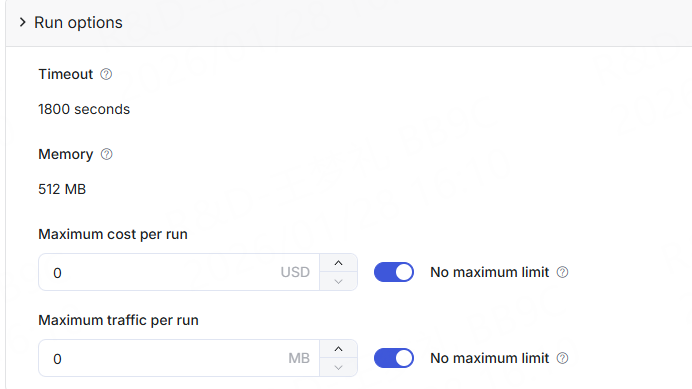
5.2 Advanced Configuration (Optional)
Advanced users may configure the following options as needed:- Concurrency limits
- Timeout strategies
- Exception handling methods
6. Start the Collection Task
6.1 Start the Task
After completing the parameter configuration, click the “Start” button. The system will validate the task configuration. Once validation passes, the task will enter the running state.6.2 View Task Status
Users can view task statuses in the Run list:- Pending
- Running
- Completed
- Failed
-
Error
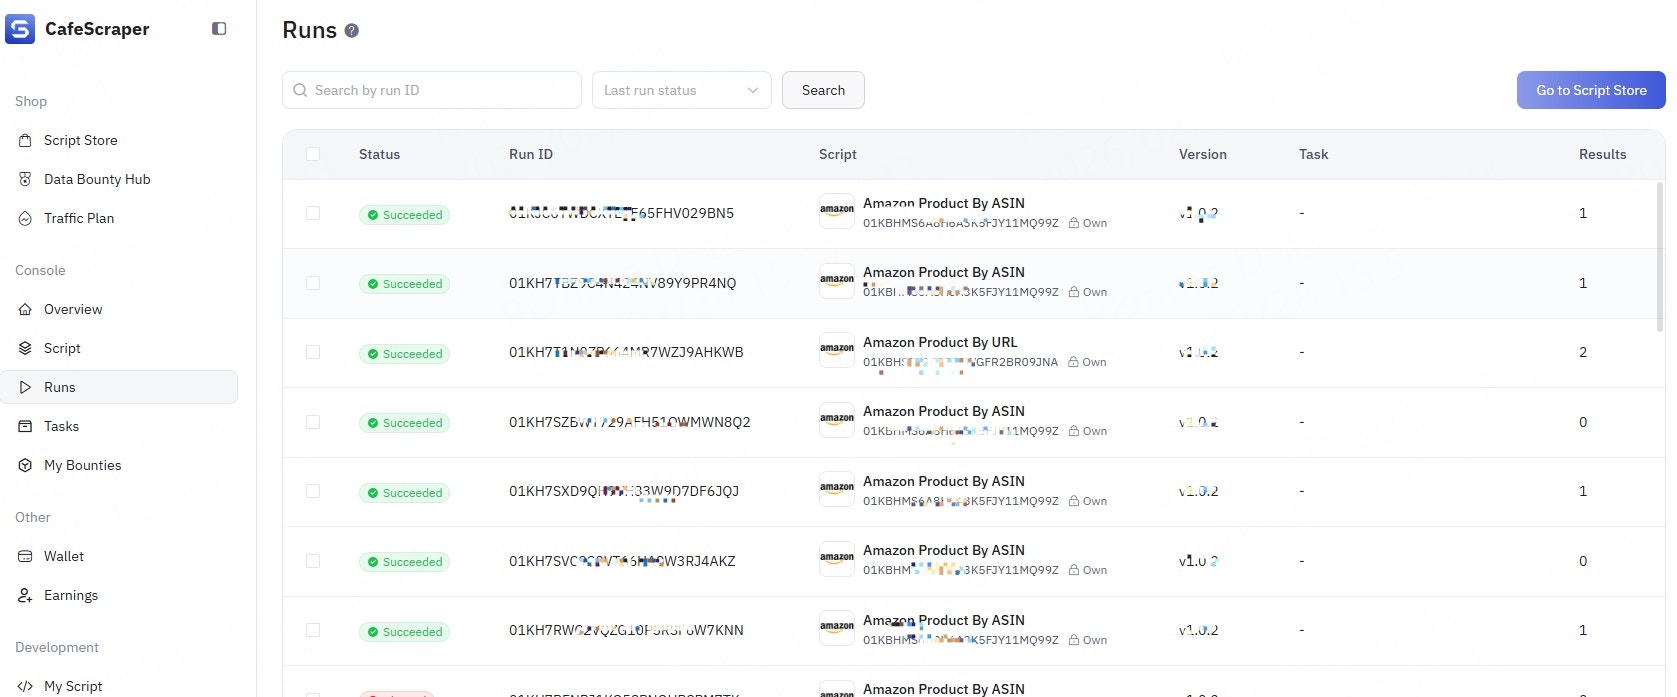

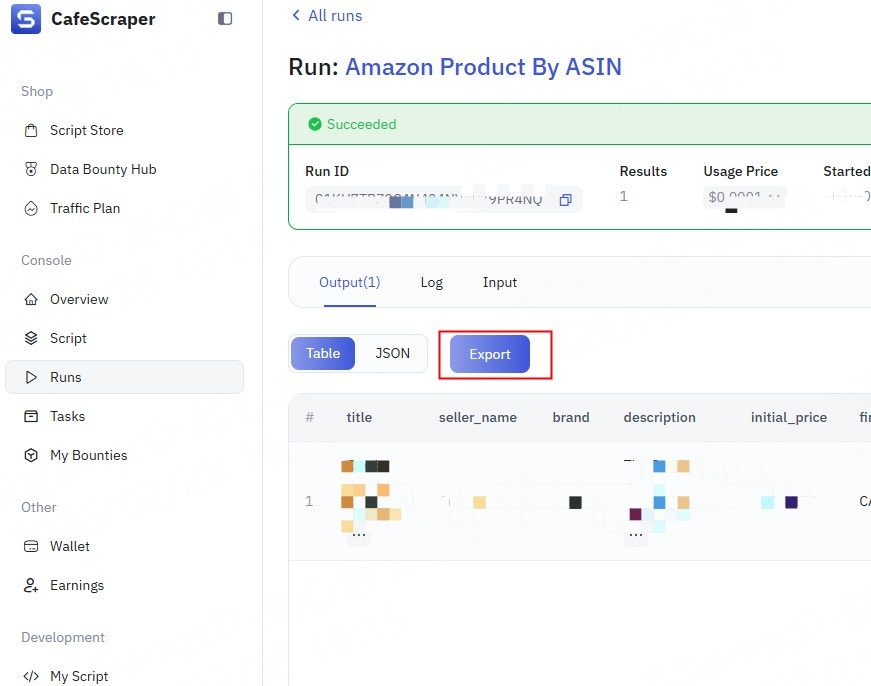
7. View Collection Results
7.1 Access the Results Page
After the task is completed, click Run → Run IDs on the right side of the task to enter the results page. On the results page, users can:- View the collected data list
- View detailed information for individual records
- Check execution logs
- Review input parameters
-
View runtime duration, cost, and related information


8. Export Data
8.1 Select Export Method
In the top-right corner of the results table, click the “Export” button. The system supports the following export formats (depending on permissions):- CSV
-
JSON


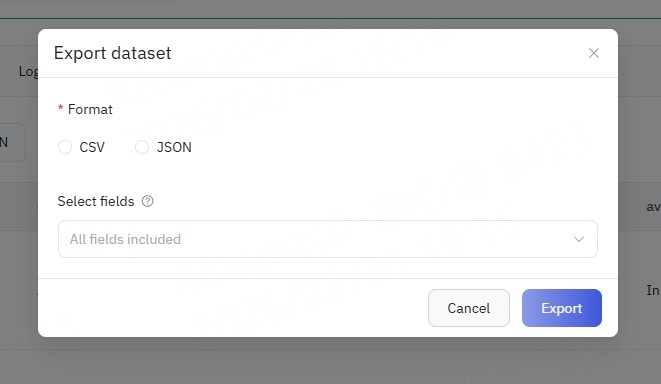
8.2 Execute Export
After selecting the export format, click “Confirm Export”. The system will generate the export file and automatically download it once ready.9. Frequently Asked Questions
- What should I do if a task keeps running indefinitely?
- Check the task logs or contact the administrator.
- What should I do if the system displays an error code?
- Record the complete error code and message.
- First, try refreshing the page or logging in again.
- If the issue persists, provide the error information to technical support or the administrator for further investigation.
- What should I do if clicking a button has no response?
- Try refreshing the page.
- Check whether your browser version is outdated. It is recommended to use the latest versions of mainstream browsers such as Chrome or Firefox.
- Disable browser extensions (especially ad blockers) and try again.
10. Documentation Notes
- Screenshots in this document are for reference only.
The actual interface is subject to the latest version of the system.